Pages

Showing posts with label SAML. Show all posts

Salesforce.com Single Sign On using ADFS v2

This is the universal identity problem – too many user accounts for the same person.  As such, one of my internal goals here is to simplify identity at ObjectSharp.
While working on another internal project with Salesforce i got to thinking about how it manages users.  It turns out Salesforce allows you to set it up as a SAML relying party.  ADFS v2 supports being a SAML IdP.  Theoretically we have both sides of the puzzle, but how does it work?
Well, first things first.  I checked out the security section of the configuration portal:
image
There was a Single Sign-On section, so I followed that and was given a pretty simple screen:
image
There isn’t much here to setup.  Going down the options, here is what I came up with:
SAML Version
I know from previous experience that ADFS supports version 2 of the SAML Protocol.

Issuer
What is the URI of the IdP, which in this case is going to be ADFS?  Within the ADFS MMC snap-in, if you right click the Service node you can access the properties:


image
In the properties dialog there is a textbox allowing you to change the Federation Service Identifier:
image
We want that URI.
Within Salesforce we set the Issuer to the identifier URI.
Identity Provider Certificate
Salesforce can’t just go and accept any token.  It needs to only be able to accept a token from my organization.  Therefore I upload the public key used to sign my tokens from ADFS.  You can access that token by going to ADFS and selecting the Certificates node:
image
Once in there you can select the signing certificate:
image
Just export the certificate and upload to Salesforce.
Custom Error URL
If the login fails for some reason, what URL should it go to?  If you leave it blank, it redirects to a generic Salesforce error page.
SAML User ID Type
This option is asking what information we are giving to Salesforce, so it can correlate that information to one of their internal ID’s.  Since for this demo I was just using my email address, I will leave it with Assertion contains User’s salesforce.com username.
SAML User ID Location
This option is asking where the above ID is located within the SAML token.  By default it will accept the nameidentifier but I don’t really want to pass my email as a name so I will select user ID is in an Attribute element.
Now I have to specify what claim type the email address is.  In this case I will go with the default for ADFS, which is http://schemas.xmlsoap.org/ws/2005/05/identity/claims/emailaddress.
On to Active Directory Federation Services
We are about half way done.  Now we just need to tell ADFS about Salesforce.  It’s surprisingly simple.
Once you’ve saved the Salesforce settings, you are given a button to download the metadata:
image
Selecting that will let you download an XML document containing metadata about Salesforce as a relying party.
Telling ADFS about a relying party is pretty straightforward, and you can find the detailed steps in a previous post I wrote about halfway through the article.
Once you’ve added the relying party, all you need to do is create a rule that returns the user’s email address as the above claim type:
image


More Here


Courtesy:http://blogs.objectsharp.com/cs/blogs/steve/archive/2011/02/14/salesforce-com-single-sign-on-using-adfs-v2.aspx

Using Simple Web Token (SWT) with WIF

SAML 1.1/SAML 2.0 is the default token format when using ACS as the authentication service for your website. In this model, your website talks to ACS using WS-Federation protocol and what it normally gets back is a Saml token. This scenarios is fairly straight-forward as WIF natively supports WS-Federation protocol & SAML1.1/SAML 2.0 token formats.
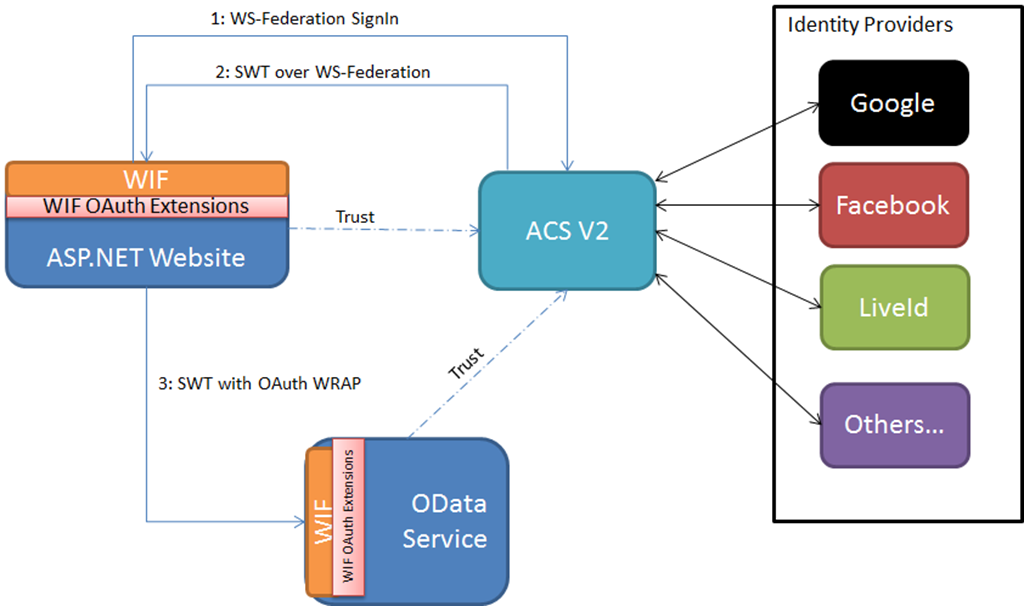
There are cases where you might want to return a Simple Web Tokens (SWT) after a successful authentication. For example, you might want to use this same SWT (available as a bootstrap token) to call other downstream REST/OData services as depicted in the following diagram.
image


ACS fully supports returning an SWT token after a successfully WS-Fed authentication but WIF currently doesn’t support SWT tokens. You would have to write a custom Security Token Handler for WIF to process SWT tokens coming back to your website. I have created some extensions which enables this and other OAuth WRAP related scenarios. Feel free to download the code from my SkyDrive.

More Here


Courtesy:http://zamd.net/2011/02/08/using-simple-web-token-swt-with-wif/

Access Control Service Architectural Model

The Access Control Service is an easily configurable, cloud-based Security Token Service (STS) that supports the authentication of user name/password, Windows CardSpace, certificate, and third-party STS-issued SAML tokens and provides an authorization framework that uses flexible, claims-based rules. The Access Control Service uses the same basic architectural model for Web applications, Web services, and smart clients. In the basic scenario, there are three participants:

The Access Control Service STS.

An application that trusts the virtual Access Control Service STS (Relying Party).


The application that uses the Relying Party (Requester).

These participants interact with one another in the following manner, discussed in more detail in this section:

A trust relationship is established between the relying party and the Access Control Service STS. The owner of the relying party provides the Access Control Service STS with its certificate. This certificate is used by the Access Control Service STS to encrypt tokens that the relying party will accept.

Before the requester can use the relying party, the owner of the relying party application defines access control rules in the STS. These rules logically grant the requester access to the relying party.

The requester sends a WS-Trust 1.3-compliant Request for Security Token (RST) to the Access Control STS.

The Access Control STS receives the RST, and uses the input claims in the RST to initiate processing of the Access Control rules defined in that STS.

After Access Control rule processing, the Access Control STS packages the output into a SAML security token, signs the token, encrypts that token with the certificate provided in step 1, and sends the token back to the Requestor.

More Here


Courtesy:http://asher2003.wordpress.com/2011/02/14/accesscontrolservice-architectural-model/

Configuring WebEx for SAML with OneLogin

Configure WebEx Enterprise in OneLogin

If you haven't already added WebEx Enterprise to your OneLogin account, you can do it via this link:
    https://app.onelogin.com/apps/new/3036
Now, configure the application.
  1. Choose SAML as authentication method
  2. Enter your subdomain, e.g. mycompany
  3. Select the roles you want to have access to WebEx
  4. Save the app

Configure SAML in WebEx

  1. Sign into your WebEx Enterprise account as the admin
  2. Click Site Administration in the menu bar
  3. Click SSO Configuration in the sidebar
  4. You should now see the page below

     webex-sso-config.png
  5. Set WebEx SAML Issuer to "http://www.webex.com"
  6.  
  7. Set Issuer for SAML to the SAML Issuer from the WebEx app in OneLogin
  8. Set Customer SSO Service Login URL to the SAML Login URL from the WebEx app in OneLogin
  9. Set AuthContextClassRef to "urn:oasis:names:tc:SAML:2.0:ac:classes:PasswordProtectedTransport"

More Here


Courtesy:http://support.onelogin.com/entries/362606-configuring-webex-for-saml-with-onelogin

Configuring WordPress for SAML with OneLogin

OneLogin's SAML plugin for WordPress allows you to easily and securely sign users into WordPress. By default users will be signed in using the email address registered in OneLogin, but you can override this by editing the logins on the app if they don't match the ones in WordPress.
If you want to prevent users from signing into WordPress directly using a password, we recommend simply obfuscating the passwords in WordPress so that users don't know them. Just make sure the admin can still sign in using password.
Configuration
  1. Sign into your WordPress account as a user who has privileges to install plugins
  2. Click Plugin in the left sidebar
  3. Now you can either search for OneLogin or you can upload the plugin attached to this article.
  4. Once the plugin is installed, activate it

    wordpress-setup-1.png
  5. The next step is to configure your OneLogin X.509 certificate so the plugin can validate SAML responses coming from your OneLogin account. In OneLogin, go to Security -> SAML and copy.
  6.  
  7. Click Settings in the sidebar in WordPress and then click SSO/SAML Settings

    wordpress-setup-2.png
  8. Paste the certificate into the text field and click Save Changes. This completes the setup of WordPress.
  9. Now add WordPress to your OneLogin account. The Site URL should be the root URL of your wordpress site. VERY IMPORTANT: The URL must end with a slash (/) or the plugin will not pick up SAML responses.

More Here


Courtesy:http://support.onelogin.com/entries/383540

SSO in Web Services Using SAML

Introduction:


Web Services provides a standard mean of interoperating between different software
applications running on a variety of platforms. The simplest web service
consists of a SOAP message for communication and a WSDL for web service
description. Web services use XML extensively which are very well understood
technology. WSDL document defines services as collection of network endpoints
or ports.


One of the main problems in distributed Web Services is security standards. Due to
different platforms the interpretation of security information has different
meaning in different security context. For instance if a J2EE application try
to exchange security information with a COM+ application, the data sent by J2EE
application will not be recognizable to COM+.
The other problem in distributed Web Services application is the
capability for single-sign on. Security Assertion Markup Language (SAML) is a
standard proposed by OASIS to solve problem like security information exchange
and how Single Sign on capabilities be provided within distributed web services
application.


Exploring SAML:


SAML is a set of specifications used for transferring information like user
authentication, entitlement, and attributes to identity provider (IP) which can
authenticate the user and allow access to resources on a server provider. In SAML a third party which is identity provider will assert the authentication information provided by the consumer and will return SAML assertion which can be passed with any incoming request to
the target or resource provider which will identify the assertion and allow
access to the corresponding activity.

By
obtaining the assertion from identity provider consumer can pass it with any
request. The same assertion can be used universally and by any part of
application which is a step forward to interoperability in security context.


All
the security services which implemented SAML are able to interpret security
information transferred by one service to another which makes SAML one of the
most accepted solutions for Web Services Security. The Assertion generated by identity provider
can be used by consumer as long as it is trusted by target or service provider.
The Service Provider can accept the principal an allow authentication.


SAML
provides three types of assertions:


1.
Authentication assertion


2.
Authorization decision assertion


3.
Attribute assertion.


Authentication
Assertion


The
authentication information is received by identity providers which process this
information and authorization assertion is made along with authorization
decision and attributes assertion.
Authentication Assertion is composed of the identity of issuer and the
principal, the period for which the assertion will be valid and some creation
time information. It also input some information about the provider system and
validation time etc.


The
following is the Authentication Statement Schema


Attribute
Assertion


More Here


Courtesy:http://asadroshan.wordpress.com/2011/01/12/sso-in-web-services-using-saml/

Apache with mod_auth_saml Receipe

Consider this receipe only one of many possible set-ups and not necessarily even the best. The receipe worked for me in September 2008. If you come much later, things may have changed.
This Apache set-up illustrates mod_auth_saml. If you are interested in CGI, mod_php, or mod_perl use with Apache, or compilation of Apache httpd with above bits and pieces, please refer to Apache Setup Receipe
For more general information about ZXID.org compilation or APIs start reading in README.zxid.

1 Architectural Overview


Fig-1: ZXID, via mod_auth_saml, adds to Apache httpd Single Sign-On (SSO), Attribute Broker, and XACML PEP Capabilities that can be used by existing static and dynamic content without alteration.

2 Introduction to mod_auth_saml


For avoidance of doubt, mod_auth_saml - based on zxid.org - is a separate project from mod_authn_casa, mod_scalp and mod_mellon, which provide somewhat similar functionality, but have different code bases. It may be possible to use all of these simultaneously, but this is not recommended unless you are an expert that can sort out the differences.
mod_auth_saml provides Apache2 native integration at authentication layer. The objective of mod_auth_saml is to cause Apache to trigger SAML 2.0 Single Sign-On instead of HTTP Basic or Digest authentication.
mod_auth_saml does not backend in any module in the mod_authn_* sense. All authentication information is obtained from the frontend IdP without consulting any backend. (However, the zxid.org session mechanism needs backend storage - once zxid.org is generalized to support other backends than the default file system, we may factor out the local session storage to a backend of its own.)
If you want to perform local authentication after the SSO, mod_auth_saml will provide for downstream mod_authz_* modules a (pseudonymous) user identifier that can be used to make the authorization decisions. It will also provide the attributes that were received in the SSO or that were retrieved by later web services calls (like ID-DAP or Personal Profile calls).
Eventually mod_auth_saml may call on a mod_authn_* backend to obtain additional local attributes (beyond the ones received in the SSO). Such call will use the pseudonym as key.

2.1 Compiling from Source

You may be able to get mod_auth_saml.so in binary form, in which case all you need to do is
  make dir   # Create /var/zxid hierarchy
cp mod_auth_saml.so /usr/local/httpd/modules
For more in-depth compilation instructions, please refer to general ZXID documentation (README.zxid).
Before you try compilation and installation of mod_auth_saml, you should investigate what type of Apache install you have. Unfortunately different OS distributions do this differently, making it difficult to provide one set of instructions that would always work.
Out of box, zxid/Makefile assumes your Apache is installed where the Apache project source code distribution would put it, namely in APACHE_ROOT=/usr/local/httpd. You can change this by adding a new definition in localconf.mk.
On some distributions the Apache related files are scattered in many places that are not under any specific "root" directory. In these cases you may need to define separate variable for each use, e.g:
  localconf.mk:
APACHE_INCLUDE=-I/usr/include/apache2
APR_INCLUDE=-I/usr/include/apr-1.0
APACHE_MODULES=/usr/lib/apache2/modules
To locate the correct directories, you can try
  find / -name ap_config.h
find / -name apr.h
find / -name mod_auth_basic.so
Once everything is correctly set up, you can compile and install by saying
  make apachezxid             # Compiles
make apachezxid_install # Copies
make dir # Create directory structure
The installation step really just copies mod_auth_saml.so to modules/ subdirectory of the Apache installation.

2.2 Configuration and Testing

2.2.1 httpd.conf

First you have to make sure mod_auth_saml.so is located in the modules/ directory of your Apache httpd installation (e.g. /usr/local/httpd/modules/mod_auth_saml.so). Then you should pull the module into the configuration with directive:
  LoadModule auth_saml_module modules/mod_auth_saml.so
Next you should configure the Location protected by SSO:
  
Require valid-user
AuthType "saml"
ZXIDConf "URL=https://sp1.zxidsp.org:5443/protected/saml"
The /protected is the directory you choose to protect. AuthType must be "saml". The ZXIDConf directive allows you to pass any and all ZXID configuration directives, using query string format. Please see main ZXID documentation (README.zxid) for full discussion of the configuration options.
While most options can be left at their default value, the URL always needs to be specified. It must match the domain name and the directory that you choose to protect. The final suffix /saml is used as communications end point during protocol exchanges. You can choose any word you want (i.e. need not be "saml"), but it must not conflict with any actual content in the directory and must be immediate child of the directory.
As of version 0.28 (Sept 2008) you still need to create actual file to correspond to the URL:
  touch /usr/local/httpd/htdocs/protected/saml
We expect to remove this requirement for dummy file in a future version.

2.2.2 Trying it out

Try accessing
  https://sp1.zxidsp.org:5443/protected/somefile
You should first land on IdP selection and then after authentication to the IdP, see the file, or error message if the file does not exist.

2.2.3 Setting up Circle of Trust

  • Auto-CoT method
  • Manual methods

2.3 Real World Example

Assume you want to set up a complex web site with some areas protected strongly, others moderately, and some not at all.
  /          -- No protection
/pers -- Optional SAML SSO. If SSO has been performed, the
content will be personalized. If no SSO has been
performed -- or fails -- nonpersonalized content
is served. Default IdP is used.
/intra -- Requires SAML SSO with default IdP
/protected -- Requires any SAML SSO with choice of IdP
/strong -- Requires SAML SSO with strong credentials and choice of IdP
/other -- Independent SP colocated with same web server. Login
to any of the first 4 directories does not count
as login to /other. It is its own entity and needs
separate SAML SSO.
  1. Here's how you would configure it in httpd.conf (SSL and other configuration items are as usual and are not reproduced here):
         LoadModule auth_saml_module modules/mod_auth_saml.so


    Require valid-user
    AuthType "saml"
    ZXIDConf "URL=https://sp1.zxidsp.org:5443/protected/saml"
    ZXIDConf "DEFAULTQS=l0https://s-idp.liberty-iop.org:8881/idp.xml=1%26fp=1"


    Require valid-user
    AuthType "saml"
    ZXIDConf "URL=https://sp1.zxidsp.org:5443/protected/saml"
    ZXIDConf "DEFAULTQS=l0https://s-idp.liberty-iop.org:8881/idp.xml=1%26fc=1"
    ZXIDConf "REQUIRED_AUTHNCTX=urn:oasis:names:tc:SAML:2.0:ac:classes:PasswordProtectedTransport$urn:oasis:names:tc:SAML:2.0:ac:classes:Strong"


    Require valid-user
    AuthType "saml"
    ZXIDConf "URL=https://sp1.zxidsp.org:5443/protected/saml"
    ZXIDConf "ANON_OK=/pers/"
    ZXIDConf "REDIR_TO_CONTENT=1"


    Require valid-user
    AuthType "saml"
    ZXIDConf "URL=https://sp1.zxidsp.org:5443/protected/saml"
    ZXIDConf "REQUIRED_AUTHNCTX=urn:oasis:names:tc:SAML:2.0:ac:classes:Strong"
    ZXIDConf "IDP_SEL_PAGE=/idpsel.cgi"


    Require valid-user
    AuthType "saml"
    ZXIDConf "PATH=/var/other/"
    ZXIDConf "URL=https://sp1.zxidsp.org:5443/other/saml"
    ZXIDConf "SES_COOKIE_NAME=OtherSes"
    Notes
    1. /pers, /intra, and /strong are "slaves" of /protected. This means they can have some settings of their own, but other settings, especially those that apply after SSO, are shared with /protected
    2. The slaves share Entity ID, session cookie, and session with the master.
    3. /other is genuinely different SP with its own Entity ID, cookie and session directory.
    4. The ANON_OK describes prefix under which SSO failure is not considered fatal. Currently there can only be one such prefix per master SP. This is known limitation.
    5. The REDIR_TO_CONTENT is set in master and shared with slaves. This causes the SSO to end with 302 redirection to the original content so that the URL in browser's address bar will appear clean. Without this option, the last step of the SSO protocol might be visible and since SSO terminates in master SP, the slaves would have their relative URLs wrong.
    6. The DEFAULTQS specification is used to simulate user submitting the IdP selection form. It is used for the SPs for which the IdP is always the same. The Query String can also have some other form fields that control things like the ispassive flag (fp=1) or the allowcreate flag (fc=1). To understand what fields are possible, you can "View Source" the regular IdP selection page. The value of the DEFAULTQS option needs to be URL encoded to prevent premature interpretation as multiple configuration options. In particular the ampersand must be encoded as %26.
    7. The IDP_SEL_PAGE allows you to build a fully custom IdP selection page. Here we use it for requesting strong authentication context. Other simpler ways to customize the IdP Selection Page exist, see e.g. IDP_SEL_START.
  2. Create directories in the web root according to above plan. You also need to create the /var/other hierarchy since you want to keep /other as separate entity from rest of the directories
         make dir ZXID_PATH=/var/other/
    N.B. The last slash is important.
    Make sure the web server process has file system permissions to write to /var/zxid and /var/other.

2.4 Testing

To enable debugging output, you should add
  ZXIDDebug "0x61"
to the above configuration.
  1. Make sure you are logged out from your IdP and SP (e.g. delete cookies in browser)
  2. https://sp1.zxidsp.org:5443/pers/env.cgi
    • IdP selection should not show up.
    • IdP should not ask credentials.
    • You should see dump of environment variables
    • SAML_authnctxlevel=-
    • SAML_idpnid=-
  3. https://sp1.zxidsp.org:5443/intra/env.cgi
    • IdP selection should not show up. (bug: currently it does ***)
    • IdP should ask credentials
    • You should see dump of environment variables
    • SAML_authnctxlevel=urn:oasis:names:tc:SAML:2.0:ac:classes:PasswordProtectedTransport
    • SAML_idpnid=Peq7sdf-o0brJQcyrFvVh
  4. https://sp1.zxidsp.org:5443/pers/env.cgi
    • This time the session is well authenticated so you should see the same dump as in step (3).
  5. Logout by https://sp1.zxidsp.org:5443/protected/saml?o=m and clicking "Single Logout (R)"

2.5 mod_auth_saml FAQ

  1. How it actually works, does the module intercept every http request/response?
    It intercepts every HTTP request destined to URL prefixed by what appears in httpd.conf configuration, i.e. Apache itself prefilters by URL prefix.
    Then it checks if cookie session is present - if so, the request is passed through to rest of Apache processing. If not, it will start the SSO processing by presenting the IdP selection screen. Eventually this will be improved to attempt automatic detection of IdP, e.g. if there is only one IdP in the CoT.
    If the URL is the special one configured in
          ZXIDConf "URL=https://sp1.zxidsp.org:5443/protected/saml"
    it will pass control to the ZXID code.
    If SSO was triggered, the original URL is held in RelayState and once the SSO completes (which will happen at the special URL), a redirect is performed to the original URL found from RelayState. This could be used beneficially in unsolicited SSO as well.
  2. Does it have the reverse proxy functionality or is it located elsewhere?
    mod_auth_saml works at the same layer and much the same way as HTTP Basic authentication is implemented in Apache. It runs in the Apache process itself and does not invoke any external helper.
    It is not a reverse proxy. However, it is possible to configure a frontend Apache server, with mod_auth_saml, to act as a reverse proxy.http://www.apsis.ch/pound/) should not be difficult.))" alt=" ((Integrating zxid to a dedicated reverse proxy like Pound (http://www.apsis.ch/pound/) should not be difficult.))">
  3. Is it OS independant? I mean, works both for Apache-Linux and Apache-Windows and Apache-Solaris? I wonder not directly, but could be compiled, right?
    It should not be OS dependant. For Unixes I am pretty sure this is a fact. For Windows we need more testing (as of May 2008). It does not yet (May 2008) work in IIS.
  4. How the session creation at application is handled?
    The name of the cookie that ZXID sets is configurable (by default it is called ZXIDSES). This may be enough for some applications.

2.6 Important TODO items for mod_auth_saml

Memory management needs an audit. The problem centers around memory management of dependency libraries openssl and libcurl. Both libraries as well as ZXID itself have vectorable memory allocators, i.e. you can supply your own implementation of malloc(3) and free(3). This allows Apache pool allocation functions to be used instead of the traditional malloc(3) and free(3).
Unfortunately life is not that simple. Which pool should we use? The per request pool is suitable for most purposes, but how can we know for what purpose openssl and libcurl allocate memory? There is no easy way of knowing and the ephemeral nature of per request allocation may land us in trouble. Other option would be to allocate everything from global pool to make sure the memory will never be freed under us. Unfortunately memory from the global pool can not be freed. Thus we may be better sticking to malloc(3) and free(3).
To make matters worse, openssl is used by all of zxid, libcurl, and Apache mod_ssl. Which one gets to set the function pointers that point to the allocator? There is no easy answer - or at least we have not seen one yet.
The allocator problems may be just about manageable for Apache running in traditional pre-fork server mode, but become a real nightmare for threaded execution modes.

2.7 mod_authz_xacml

We plan to develop a mod_authz_* layer module that will perform the authorization using XACML. mod_authz_xacml will act as a PEP and pass all available session attributes to a PDP and then act on the decision of the PDP to deny or permit access to a web resource. This is still WIP.


More Here


Courtesy:http://www.zxid.org/html/mod_auth_saml.html

Attribute-Based Authorization

SAML is being applied in a number of different ways, one of which is Attribute-based authorization.
The attribute-based authorization model has one web site communicating identity information about a subject to another web site in support of some transaction. However, the identity information may be some characteristic of the subject (such as a person's role in a B2B scenario) rather than, or in addition to, information about when and how the person was authenticated. The attribute-based authorization model is

important when the individual's particular identity is either not important, should not be shared (for privacy reasons), or is insufficient on its own.
 

See also:

- SAML Executive Overview
- SAML Technical Overview

More Here


Courtesy:http://saml.xml.org/attribute-based-authorization

How to use SAML 2.0 Token Profile Support in Rampart 1.5

From 1.5 release onwards Apache Rampart supports SAML 2.0 Token Profile. With this new feature, it allows web service consumers to obtain SAML 2.0 tokens from Security Token Services(STS) and use those tokens to consume other services which impose the presence of a SAML 2.0 token in a SOAP request. In this post, I am explaining how to use a SAML 2.0 token using Apache Rampart in a WS Trust scenario.


1. As the first step you need to set up Apache Axis2 + Rampart. You can download Axis2 1.5 from here and Rampart 1.5 from here.(Since Rampart 1.5 is not released yet, I have hosted the binaries built from the 1.5 branch) I am using an Axis2 deployment on Apache Tomcat to host services in this post.


* You can simply download Axis2 webapp and deploy it in Apache Tomcat. (I am referring the tomcat installation directory as TOMCAT_HOME from here onwards)
* Copy the set of jars inside the lib directory of Rampart binary distribution into $TOMCAT_HOME/webapps/axis2/WEB-INF/lib and copy the rampart and rahas module archives(.mar) files into $TOMCAT_HOME/webapps/axis2/WEB-INF/modules directory. Rampart makes use of WSS4J for SAML token validation. Because WSS4J release with the SAML 2.0 token validation support is yet to be released, I am using a custom WSS4J implementation in this scenario. Please download wss4j-1.5.7.wso2v2.jar from here and replace the wss4j-1.5.8.jar which is shipped with Rampart.

* To use SAML 2.0 support, it is required to endorse the default JAXP implementation of the JDK with Apache Xerces and Xalan. You can find more information on how to endorse the JDK in the README file of Rampart binary distribution. Since Tomcat uses its own endorsed directory, it is required to endorse the Tomcat deployment. You can copy the same set of jar files which is used to endorse the JDK to $TOMCAT_HOME/endorsed directory. For convenience, I have hosted the necessary endorsing jars here. You can download this set of jars and copy them to $JAVA_HOME/jre/lib/endorsed directory.


2. As the second step you need to set up the STS and the relying party service. I am using the SAML 1.1 sample shipped with Apache Rampart with some modifications to make it use SAML 2.0. We are using a service archive which contains both relying party service and configurations for STS. STS is implemented inside Rampart and it is sufficient to provide only the configuration. You can download the this service archive named “samlple05.aar” from here. This service archive will contain a service group where STS and Sample05 are the members of that service group.


* It is possible to configure STS according to the user requirements. STS configuration of this sample can be found in services.xml file inside the META-INF directory of the extracted service archive. These configurations are available in the element. Lets go through some of the important parameters of this configuration.
o issuerName – This is used to identify the issuer, this could be the end point of the issuer or any other identifier used by the relying party services.
o issuerKeyAlias – This is the alias of the certificate that STS will be using for signing SAML Assertions.
o issuerKeyPassword – Private key password of the certificate of the STS
o cryptoProperties – The child elements of this configuration element is used to identify the keystore which is used by the STS. Location of the keystore, keystore type and keystore password are specifed as child elements of this parameter.
o timeToLive – Validity period of a SAML assertion(mentioned in seconds)
o trusted-services – Under this parameter, you can specify the EPRs of the trusted relying party services for which users are obtaining SAML tokens. It is possible to specify a wildcard character, so that STS trusts any relying party service. In this sample, we have used a wildcard character. But in real world scenarios, it is recommended not to use this and mention the trusted services specifically.
* STS is a web service, hence it is possible to publish its requirement as a policy. Please note that, it is better if STS can express its authentication requirements for the user in its policy. In this case, we are using a security policy which contains a Asymmetric Binding. So the X.509 certificate of the client is used to authenticate him.
* Then it contains the policy and configuration required for the relying party service (sample05) which has a ‘echo’ operation. The security policy of the relying party service imposes the presence of a SAML 2.0 token in the SAML request.


https://kirillgdev04/Security_Federation_SecurityTokenService_Indigo/Symmetric.svc/Scenario_1_IssuedTokenOverTransport_UsernameOverTransport


urn:oasis:names:tc:SAML:2.0:assertion
http://schemas.xmlsoap.org/ws/2005/02/trust/SymmetricKey
256


This policy assertion establishes the requirement for a SAML 2.0 assertion which uses a symmetric key with a length of 256 bit for SAML subject confirmation. These requirements are specified in the RequestSecurityTemplate policy assertion.


* Then lets deploy this service archive in Axis2. You can simply copy sample05.aar file into $TOMCAT_HOME/webapps/axis2/WEB-INF/services/ directory and restart Tomcat if you haven’t enable hot deployment.


3. Now lets look at the client code.


package org.wso2.sts;


import org.apache.axiom.om.OMAbstractFactory;
import org.apache.axiom.om.OMElement;
import org.apache.axiom.om.OMFactory;
import org.apache.axiom.om.OMNamespace;
import org.apache.axiom.om.impl.builder.StAXOMBuilder;
import org.apache.axiom.soap.SOAP12Constants;
import org.apache.axis2.addressing.AddressingConstants;
import org.apache.axis2.addressing.EndpointReference;
import org.apache.axis2.client.Options;
import org.apache.axis2.client.ServiceClient;
import org.apache.axis2.context.ConfigurationContext;
import org.apache.axis2.context.ConfigurationContextFactory;
import org.apache.neethi.Policy;
import org.apache.neethi.PolicyEngine;
import org.apache.rahas.RahasConstants;
import org.apache.rahas.Token;
import org.apache.rahas.TokenStorage;
import org.apache.rahas.TrustException;
import org.apache.rahas.TrustUtil;
import org.apache.rahas.client.STSClient;
import org.apache.rampart.RampartMessageData;
import org.apache.ws.secpolicy.SP11Constants;
import org.apache.ws.secpolicy.SPConstants;
import org.opensaml.XML;


import javax.xml.namespace.QName;


public class Client {


public static void main(String[] args) throws Exception {


//TODO : replace with the local paths in your machine
String epr = "http://localhost:8081/axis2/services/sample05";
String repo = "/path/to/repo";
String servicePolicy = "/path/to/service-policy.xml";
String stsPolicy = "/path/to/sts-policy.xml";


ConfigurationContext ctx = ConfigurationContextFactory.createConfigurationContextFromFileSystem(repo, null);


STSClient stsClient = new STSClient(ctx);


stsClient.setRstTemplate(getRSTTemplate());
stsClient.setVersion(RahasConstants.VERSION_05_12);
String action = TrustUtil.getActionValue(RahasConstants.VERSION_05_02, RahasConstants.RST_ACTION_ISSUE);
stsClient.setAction(action);


//Obtain the token
Token responseToken = stsClient.requestSecurityToken(loadPolicy(servicePolicy),
"http://localhost:8081/axis2/services/STS", loadPolicy(stsPolicy), epr);


System.out.println("\n------------------------------ Requested Token ---------------------------------------\n");
System.out.println(responseToken.getToken().toString());


TokenStorage store = TrustUtil.getTokenStore(ctx);
store.add(responseToken);


//Call the relying party service
ServiceClient client = new ServiceClient(ctx, null);


Options options = new Options();
options.setAction("urn:echo");
options.setTo(new EndpointReference(epr));
options.setProperty(RampartMessageData.KEY_RAMPART_POLICY, loadPolicy(servicePolicy));
options.setProperty(RampartMessageData.KEY_CUSTOM_ISSUED_TOKEN, responseToken.getId());
client.setOptions(options);


client.engageModule("addressing");
client.engageModule("rampart");


OMElement response = client.sendReceive(getPayload("Hello world1"));
System.out.println("Response : " + response);


}


private static Policy loadPolicy(String xmlPath) throws Exception {
StAXOMBuilder builder = new StAXOMBuilder(xmlPath);
return PolicyEngine.getPolicy(builder.getDocumentElement());
}


private static OMElement getPayload(String value) {
OMFactory factory = OMAbstractFactory.getOMFactory();
OMNamespace ns = factory.createOMNamespace("http://sample05.policy.samples.rampart.apache.org", "ns1");
OMElement elem = factory.createOMElement("echo", ns);
OMElement childElem = factory.createOMElement("param0", null);
childElem.setText(value);
elem.addChild(childElem);


return elem;


}


private static OMElement getRSTTemplate() throws Exception {
OMFactory fac = OMAbstractFactory.getOMFactory();
OMElement elem = fac.createOMElement(SP11Constants.REQUEST_SECURITY_TOKEN_TEMPLATE);
TrustUtil.createTokenTypeElement(RahasConstants.VERSION_05_12, elem).setText(RahasConstants.TOK_TYPE_SAML_20);
TrustUtil.createKeyTypeElement(RahasConstants.VERSION_05_12, elem, RahasConstants.KEY_TYPE_SYMM_KEY);
TrustUtil.createKeySizeElement(RahasConstants.VERSION_05_12, elem, 256);


return elem;
}
}


Above listing depicts the complete version of the Client code. In order to make this work, you need to make some changes in the paths to repos, policies etc. Modify the repo, epr, servicePolicy and stsPolicy accordingly. I am explaining some of the important code segments of the above code for the sake of completion.


* After instantiating the STSClient object, we set its RSTTemplate. In this code, getRSTTemplate() method is used to create the RSTTemplate. The SAML version, key type and the key size are set to the RST(Request Security Token) inside this method. Following code snipped sets the SAML version, Key type and key length in RST.


TrustUtil.createTokenTypeElement(RahasConstants.VERSION_05_12, elem).setText(RahasConstants.TOK_TYPE_SAML_20);
TrustUtil.createKeyTypeElement(RahasConstants.VERSION_05_12, elem, RahasConstants.KEY_TYPE_SYMM_KEY);
TrustUtil.createKeySizeElement(RahasConstants.VERSION_05_12, elem, 256);


* Then we set the RST action. In this scenario, we are requesting a token from the STS. So the corresponding trust action is ISSUE.


String action = TrustUtil.getActionValue(RahasConstants.VERSION_05_02, RahasConstants.RST_ACTION_ISSUE);
stsClient.setAction(action);


* Then the RST is sent to the STS. Here, we are passing the EPR of the RP service as a parameter. This is going to be checked against the set of trusted services we specified in the sts-configuration.


Token responseToken = stsClient.requestSecurityToken(loadPolicy(servicePolicy), "http://localhost:8081/axis2/services/STS", loadPolicy(stsPolicy), epr);


* After obtaining the token, we are storing it in the trust store and then sending it to the RP service.


You can download the source code, policy files and client site key store from here. Please note that you have to change the rampart-config parameters in both policy files to reflect your local settings.


In this sample, we are using a password callback handler to load the passwords of the private keys. In the client’s end, we are using the following password callback handler.


package org.wso2.sts;


import org.apache.ws.security.WSPasswordCallback;


import javax.security.auth.callback.Callback;
import javax.security.auth.callback.CallbackHandler;
import javax.security.auth.callback.UnsupportedCallbackException;
import java.io.IOException;


public class PWCBHandler implements CallbackHandler{
public void handle(Callback[] callbacks) throws IOException, UnsupportedCallbackException {
for (int i = 0; i < callbacks.length; i++) { WSPasswordCallback pwcb = (WSPasswordCallback)callbacks[i]; String id = pwcb.getIdentifer(); if("client".equals(id)) { pwcb.setPassword("apache"); } else if("service".equals(id)) { pwcb.setPassword("apache"); } } } } To get the client code up and running you need to add certain set of jars to your classpath. Most straight forward approach is adding the Axis2 ‘lib’ into your classpath. It contains all the jars required to compile and run this sample. Following listing depicts the RST sent from Client to STS.
http://docs.oasis-open.org/ws-sx/ws-trust/200512/Issue


http://localhost:8081/axis2/services/sample05


2009-10-20T13:15:51.739Z
2009-10-20T13:20:51.739Z

http://docs.oasis-open.org/wss/oasis-wss-saml-token-profile-1.1#SAMLV2.0
http://docs.oasis-open.org/ws-sx/ws-trust/200512/SymmetricKey
256


g5WVRpUl7bKno8LYFC9JUGLpe1NZpkZ/


http://docs.oasis-open.org/ws-sx/ws-trust/200512/CK/PSHA1


In this RST, RequestType is set to “http://docs.oasis-open.org/ws-sx/ws-trust/200512/Issue”. We have passed EPR of the RP service as a parameter when requesting the token. If you carefully observe AppliesTo element, you will note the EPR we have passed has been set as the value of this element. Similarly the token type, key type and the key size are also appearing in the RST as we have set them in the RSTTemplate. The “Entopy” element is used pass a binary secret which is used to derive keys. I am not going into further details about key derivation is WS Trust. Plese refer to the WS Trust specification for further details.


Following is the resulting RSTR(Request Security Token Response) returned by the STS.


http://docs.oasis-open.org/wss/oasis-wss-saml-token-profile-1.1#SAMLV2.0
256


http://localhost:8081/axis2/services/sample05


2009-10-20T15:13:26.138Z
2009-10-20T15:13:56.138Z


SAMPLE_STS
...


http://docs.oasis-open.org/ws-sx/ws-trust/200512/CK/PSHA1


r/JgXgGMFb4afwRQpggqky8q4TQm7pdXm8RQq9IgCzI=


SAML assertion contained in the RSTR is removed for brevity.

In this post, we have looked about the STS Configuration of Apache Rampart, how to obtain a SAML 2.0 Token, and how to use it to consume a web service. If you faced any issues, do not hesitate to post them here.

More Here


Courtesy:http://thilinamb.wordpress.com/2009/10/20/saml-2-0-token-profile-support-in-rampart-1-5/

Troubleshooting SAML 2.0 Exchange #SAML #IdM #Identity #

  1. Download and install Live HTTP Headers (a Firefox add-on)
  2. Enable Live HTTP Headers from your browser (Tools>Live HTTPHeaders)

Capture:

  1. Attempt the SSO between IDP and SP
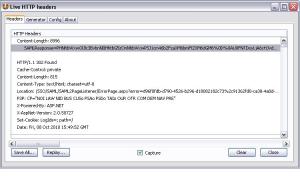
  2. In LiveHTTPHeaders look for string labeled “SAMLResponse” and capture (copy) the entire string.  This is a base64 and URLEncoded string.


Once you have captured the string:

  1. Browse over to SAML 2.0 Debugger and paste the SAML Response string into the window.
  2. Click on Decode
This will show you what the assertion that is being passed from the IDP to the SP looks like.  It’s very helpful to determine what attributes and values are being provided to the SP.  In my case I had neglected to include a key attribute that identified the IDP to the SP.
Good luck and let me know if you have any questions.

More Here


Courtesy:http://blog.tumy-tech.com/2010/10/08/troubleshooting-saml-2-0-exchange-saml-idm-identity-federation/

Caching problems with SAML

Anyone who has worked with SAML knows very well how effective and simple it is to achieve federated services with your own authentication mechanism. What needs to be remembered, though, is that end-users might very well be behind firewalls. And with that come proxies; and those proxies open up the Pandora’s box aka cache.
Proxies can cache POST response from the authentication user agent and make user1 see a page which says ‘Welcome user2′. Do a forced-refresh (Ctrl-F5, Cmd-R) on the browser, and you can see your own ID again.

Fixes:
1. Ensure proxies don’t cache any content for your authentication domain.


2. Pass a ‘random’ value like the timestamp using Javascript to the URL (to make it unqiue)
3. Force the content-provider’s web server, and the user agent web server to set Cache-Control to max-age=0 and proxy-revalidate.
4. Make sure you’re sending an invalidation string in the packet as well.
Clearing proxies in a company with about ~100 proxy servers might not be the right choice. The onus should lie on the development and the sysadmin team to make sure
important pages are non-cacheable. Never trust proxy servers is the motto here.

More Here


Courtesy:http://mohitsuley.wordpress.com/

Steps to configure SAML 2 on Weblogic Server 10.3.x

1) First we need to create a security database for SAML configuration. This has to be done even before domains are created.
Steps to use a pointbase database provided with Weblogic Installation :
  • Copy ” pbembedded.lic ” located in ” C:\bea10.3\wlserver_10.3\common\eval\pointbase\lib ” to ” C:\bea10.3\wlserver_10.3\common\eval\pointbase\tools “
  • We need to create two security database – one for the source side domain and another for the destination end domain.
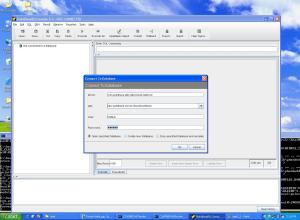
  • Now start the PointBase server ( run ” startPointBase.cmd ” located in ” C:\bea10.3\wlserver_10.3\common\eval\pointbase\tools “
  • Start the PointBase console  ( run ” startPointBaseConsole.cmd ” located in ” C:\bea10.3\wlserver_10.3\common\eval\pointbase\tools “
  • Login using the user name ” EXAMPLES ” and password ” EXAMPLES “

  • Now lets create a database table using the sample ” rdbms_security_store_pointbase.sql ” located in ” C:\bea10.3\wlserver_10.3\server\lib “

  • Now we need to create another database using the user name ” PUBLIC ” and password ” PUBLIC “

So now we have successfully created two security database, lets cerate the domains now.
We need to create the following domains on WLS 10.3.x :
Domain1 name : saml_source   ;    non ssl port : 7001 ;  ssl port : 7002
Domain2 name : saml_destination  ;  non ssl port : 7003  ;  ssl port : 7004
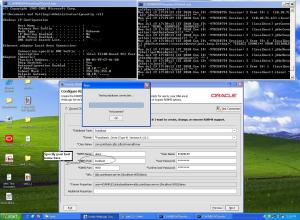
Now run the ” Configuration Wizard ” On the ” Customize Environment and Services Settings ” screen select the option ” Yes “

  • Select the option “I want to create, change, or remove RDBMS support” and make the changes as shown in the figure below, and also click on ” Test Connection ” button to make sure that the database is configured properly.

  • We need to configure ” Custom Identity and Custom Trust ” on Weblogic servers.
Refer the link below to know more about configuring ” Custom Identity and Custom Trust ” :
Link : http://wls4mscratch.wordpress.com/2010/06/08/steps-to-configure-custom-identity-custom-trust-on-wls/
  • Now we need to configure ” Credential Mapper ” on the IDP end.
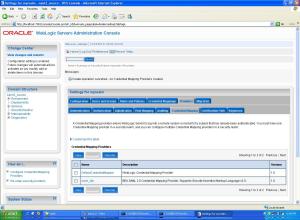
  • So to ” myrealm ” –> ” Providers ” –> ” Credential Mapping ” –> and add a ” SAML2CredentialMapper ” as shown below :

  • Now click on the newly created SAML2CredentialMapper say ” saml_IDP ” and make the following changes :
    • Issuer URI : http://www.souresite.com/saml
    • Name Qualifier : sourcesite.com
    • Web Service Assertion Signing Key Alias : cooldragon
    • Web Service Assertion Signing Key Pass Phrase : **********
    • Please type again To confirm : *********


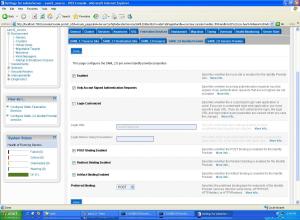
  • Click on ” Servers ” –> Admin Server –> ” Federation Services ” –> ” SAML 2.0 Identity Provider ” and make the following changes :
    • Enabled : check
    • Only Accept Signed Authentication Request : check
    • Preferred Binding : POST

  • Now click on ” Servers ” –> Admin Server –> ” Federation Services ” –> ” SAML 2.0 General ” and make the following changes :
    • Replicated Cache Enabled – Uncheck
    • Contact Person Given Name
    • Contact Person Surname
    • Contact Person Type
    • Contact Person Company
    • Contact Person Telephone Number
    • Contact Person Email Address
    • Organization Name
    • Organization URL
    • Published Site URL : http://:/saml2
    • Entity ID : ( Source Domain name)
    • Single Sign-on Signing Key Alias
    • Single Sign-on Signing Key Pass Phrase
    • Confirm Single Sign-on Signing Key Pass Phrase
  • Save the changes and export the IDP metadata into a XML file –> Click on “ Publish Meta Data ” button. ( say IDP_Metadata.xml ). We need to copy this file to the destination domain later.


————–
Destination Side :
Now we need to generate the SAML destination site ( SP ) metadata
  • Click on ” myrealm ” –> ” Providers ” –> ” Authentication ” –> new ” SAML2IdentityAsserter “


  • Click on ” Servers ” –> Admin Server –> ” Federation Services ” –> ” SAML 2.0 Service Provider ” and make the following changes :
    • Enabled : check
    • Always Sign Authentication Requests : check
    • Force Authentication : Check
    • Preferred Binding : POST
    • Default URL : http://:/samldest01App

  • Now click on ” Servers ” –> Admin Server –> ” Federation Services ” –> ” SAML 2.0 General ” and make the following changes :
    • Replicated Cache Enabled : Uncheck
    • Contact Person Given Name
    • Contact Person Surname
    • Contact Person Type
    • Contact Person Company
    • Contact Person Telephone Number
    • Contact Person Email Address
    • Organization Name
    • Organization URL
    • Published Site URL : http://:/saml2
    • Entity ID : ( Destination Domain name)
    • Single Sign-on Signing Key Alias
    • Single Sign-on Signing Key Pass Phrase
    • Confirm Single Sign-on Signing Key Pass Phrase


More Here


Courtesy:http://wls4mscratch.wordpress.com/2010/07/22/steps-to-configure-saml-2-on-weblogic-server-10-3-x/