Installation manual:
http://download.oracle.com/docs/cd/E17904_01/install.1111/e12002/instps2001.htm
Basic steps:
1. Install Oracle
2. Install OID (and FMW control and ODSM)
Oracle installation is quite trivial, so let’s focus on the OID installation.
- Just remember to use the AL32UTF8 character set on the database!
You need to download:
- Oracle WebLogic Server 10.3.4.
- Oracle Identity Management 11.1.1.2.0 & 11.1.1.3.0
Actual installation:
1. Install WLS 10.3.4
- Run the installation .bin
* In 64 bit environments use: JAVA_HOME/bin/java -jar wls1034_generic.jar
* You need JDK 1.6 or later
- Create a new FMW home
- Register for security updates..
- Typical or Custom
- Change or accept the installation directories (df -h …)
- Summary => Next
- Installation…
2. Install OID 11.1.1.2.0
- unzip ../ofm_idm_linux_11.1.1.2.0_32_disk1_1of1.zip …
- ./runInstaller
- Install Software – DO NOT CONFIGURE!
- Use SAME MIDDLEWARE HOME as WLS above!
- Oracle Home Directory: This will be the directory name under Middleware Home
- Installation …
- Run root script: /middleware_home_directory/oracle_home_dir/oracleRoot.sh
- Save Summary.
3. Install OID 11.1.1.3.0 Patch Set
- unzip ../ofm_idm_linux_11.1.1.3.0_32_disk1_1of1.zip …
- ./runInstaller
- Install Software
- Use same homes !
- Next, next
- Root script
- Save Summary
OID Configuration with FMW Control and ODSM:
1. Configuration
/middleware_home_directory/oracle_home_dir/bin/config.sh
- Installer starts
- Create new domain
=> FMW Control is being configured to manage OID here
* User Name: WLS Admin user details
* Domain name
- Installation location
* Weblogic Server Directory
* Oracle Instance location, new “ASInstance” (Not actual Oracle Instance)
* Oracle Instance Name, new “ASInstance” (Not actual Oracle Instance)
- De-select others than Oracle Internet Directory
=> We will configure only that
- Auto configuration ports normally OK, you can select them if you want
- Create Schema
* Create ODS Database Schema
* Connect string, for example: myserver:1521:orcl
* SYS
* Sys_password
- OID Passwords
* ODS Schema password & confirm (all directory content)
* ODSSM Schema password & confirm (OID statistics and DIP schema)
- OID information
* Realm, for example: dc=us,dc=oracle,dc=com
* Admin user: orcladmin
* Admin password: …
- Install
- Save Summary
* Note: Weblogic Console ie: http://myhost.us.oracle.com:7001/console
Verify installation:
- …home/bin/opmnctl status -l
- Alive:
* OVD
* oidldapd
* oidldapd
* oidmon => LDAP port, LDAPS port
* EMAGENT
- ldapsearch -p LDAP_port -b “” -s base “objectclass=*” orcldirectoryversion
=> orcldirectoryversion=OID 11.1.1.3.0
Open Enterprise Manager Fusion Middleware Control 11g
* For example: http://myhost.us.oracle.com:7001/em
- Find oid1 in FMW Control
- Verify version number in FMW Control
Open Oracle Directory Services Manager
* For example: http://myhost.us.oracle.com:7005/odsm
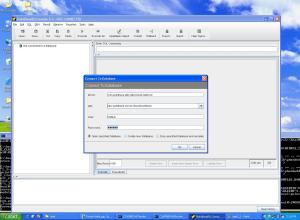
- Connect to a directory
* OID – directory name
* User Name: cn=orcladmin
* password
- Verify OID version
After you’re done installing and configuring the OID itself, you can proceed to netca to configure the destination databases “tnsnames.ora”.
That will update sqlnet.ora and ldap.ora
Examples
LDAP.ORA:
DEFAULT_ADMIN_CONTEXT = “ou=ora,dc=company,dc=com”
DIRECTORY_SERVERS = (ldap1.company.com:389, ldap2.company.com:389)
DIRECTORY_SERVER_TYPE = OID
Oracle can “officially” only use OID or AD as LDAP servers.
The type can be OID or AD. The multiple servers are for redundancy; it will not try each one in turn. Then in SQLNET.ORA:
NAMES.DIRECTORY_PATH=(LDAP, TNSNAMES)
The means try LDAP first, then try TNSNAMES.ORA, then give up.
If you want to use a third-party LDAP server, Oracle has a product called Virtual Directory that will act as a proxy between them.
More Here
Courtesy:http://www.database.fi/2011/03/oracle-internet-directory-oid-and-weblogic-installation-on-linux/


